James Ball

Web Developer

How to Debug Common Gateway Errors

When developing a web application youl commonly run in Gateway errors like502 Bad Gateway or 504 Gateway Timeout.
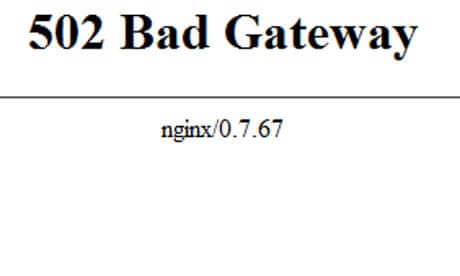
When PHP cannot process a request that Nginx sends to it, Nginx returns a gateway error. Usually, these errors are not caused by your application, but by some problem that happens before the application handles the request.

What’s The Causes of a Bad Gateway Error?

If PHP-FPM runs into an error then Nginx will render a Gateway error.

This is what will be returned if PHP-FPM runs into an error:

  • PHP-FPM is not running (perhaps due to too many error)
  • PHP-FPM has reached it’s max_children limit and cannot process any more requests
  • Some sort of PHP error such as a segfault

Gateway Timeout

When your application receives too much traffic, you might see gateway timeout errors which is when it takes too long to respond to the requests. One reason for this could be that PHP-FPM has reached its max_children limit (total number of requests that can be handled at once).

Gateway timeout errors typically occur when your app is handling too much traffic. This can correspond to PHP-FPM max_children errors (too many requests that it’s configured to handle) but mostly occurs when your database is overloaded and it can’t handle additional connections making queries. It takes too much time to return queries.

Another reason for this could be that your application is waiting for a response from a network connection that is taking too long, but the most likely cause is the database being slow.

Debugging Gateway Errors

To debug the gateway errors the best ways is to check through the logs. It’s easiest to start from the top of the server stack then move down like so:

  1. Nginx
    • The logs from Nginx usually do not have much useful information, but they might indicate some issues with PHP-FPM not running. For example, if Nginx cannot find the socket file for PHP-FPM, such as /var/run/php-fpm.sock, it will show an error in the logs.
  2. PHP-FPM
    • The most useful logs are usually the ones from FPM, because FPM is the one that gives us the error from the gateway. Sometimes you will see an error that says you have reached the limit of max_children.
  3. Server resource usage
    • top can be used to check your server resource usage. df -h can be used to check if the disk is low on space.
  4. Application logs
    • If you’ve still not found the cause of the error there could database error, error in your code, a timeout or another issue.

MJML to HTML Using PHP

If you want to create responsive email templates with ease, you can use MJML, a markup language that simplifies the process. MJML by Spatie uses semantic tags that work well even in Outlook.

First install the composer package:

1
composer require spatie/mjml-php

Then you can render a simple hello world message like so:

1
2
3
4
5
6
7
8
9
10
11
12
13
14
15
use Spatie\Mjml\Mjml;

$markup = <<<'MJML'
    <mjml>
      <mj-body>
        <mj-section>
          <mj-column>
            <mj-text>Hello World</mj-text>
          </mj-column>
        </mj-section>
      </mj-body>
    </mjml>
MJML;

$body = Mjml::new()->toHtml($markup);

The MJML PHP package and documentation can be found via GitHub at spatie/mjml-php.

My First Year of Freelancing

I have worked as a web developer for various companies in north east of the UK for nine years.

I’ve always considered going freelance but I’d always been concerned about sustaining consistent work on a full time basis.

Then one day I’d rcieved a call from my manager that the company I was working at was going to cease operating at the end of the next month.

So then I had two choices; I could either look for a full time job again, or instead take the chance and to do freelancing and work for myself instead.

In hindsight I’m much happier, not tied to 9-5 working hours and enjoy the wider variety of work.

Income

It’s incredibly satisfying doing your end-of-year accounts and seeing you’ve had a successful year. Just make sure to calculate how much tax and national insurance you’ll owe.

Id reccoment to save one third of your income to put aside for taxes and national insurance. If you need an estimate of I’d suggest visiting Listentotaxman Although I haven’t done this for my first year; lots of things you can write off a tax-deductable. Things like online learning platforms, hosting and domain name payments, and portions of your rent and utility bills if you work from home can all be taken of the amount you pay tax on.

Will I return To Full Time Employment?

Will I go back to full time employment? It would have to be a really interesting position. As I say, I’m happy being freelance and enjoying the work and working for myself more than when I was in full time employment.

On a Final Note

I’m not sure how to end this post, but if you’ve recently went freelance I’d like to know your experiences too. And if you’re thinking about going freelance, then all I can suggest is go for it!

Laravel Impersonate

I’ve recently developed a Laravel Package to temporarily login as other users when signed in as an admin, Download here.

Usage

  • You can login to another user through {app_url}/impersonate/login/{user_id}.
  • And you can end the session with {app_url}/impersonate/logout.

Install Package

1
composer require j84115/impersonate

Add Sevice Provider

Add the Package to config/app.php

1
J84115\Impersonate\ImpersonateServiceProvider::class,

Add Interface To User

Add the Interface to your User Model. Typically app/Models/User.php.

1
use J84115\Impersonate\Interfaces\ImpersonateUser;

Implement the interface.

1
class User extends Authenticatable implements ImpersonateUser

Then add your conditions for who can impersonate a user.

1
2
3
4
5
6
7
8
9
public function impersonator(): bool
{
    return $this->role === 'admin';
}

public function impersonatable(): bool
{
    return $this->email !== 'admin';
}

Routing

Add the following macro to your routes. Typically guarded with auth Middleware in routes/web.php.

1
Route::impersonate();

Building a Standalone Health Status App

The purpose of this tutorial to create a standalone health monitor for sites and applications on multiple domains. On the route url of the site will be a rendered list for developers and colleagues.

This tutorial also adds a /ping endpoint that is used to receive “pong” in response.

As well as /json endpoint to receive the status data in JSON.

Create Laravel App & Install Packages

To get started we’ll need to set up a Laravel application, install Guzzle and ukfast/laravel-health-check:

1
2
3
4
5
6
7
8
9
10
11
laravel new health

cd health

cp .env.example .env
php artisan key:generate

composer require ukfast/laravel-health-check
composer require guzzlehttp/guzzle

php artisan vendor:publish --provider="UKFast\HealthCheck\HealthCheckServiceProvider" --tag="config"

Create Your First Health Check

We’ll create an example health check for this site. You should change J84115 to a namespace for the app or business as well as the class name, $name, $domain endpoint.

1
2
3
4
5
6
7
8
9
10
11
12
13
14
15
16
17
18
19
20
21
22
23
<?php

namespace App\HealthChecks\J84115;

use Illuminate\Support\Facades\Http;
use UKFast\HealthCheck\HealthCheck;

class JamesBallSiteHealthCheck extends HealthCheck
{
    public $name = 'jb-site';
    public $domain = "https://james-ball.co.uk/ping";

    public function status()
    {
        $response = Http::get($this->domain);

        if ($response->successful()) {
            return $this->okay();
        } else {
            return $this->problem("Failed to connect to $this->domain");
        }
    }
}

Register Your check

Open config/healthcheck.php and add the HealthCheck class namespace entry to the checks index or replace the existing data:

1
2
3
4
5
6
7
/*
 * List of health checks to run when determining the health
 * of the service
 */
'checks' => [
    App\HealthChecks\J84115\JamesBallSiteHealthCheck::class,
],

And if required you can: update the route-paths.health value to json, this will allow you to access the data as JSON at {app_url}/json.

1
2
3
4
5
6
7
/**
 * Paths to host the health check and ping endpoints
 */
'route-paths' => [
    'health' => '/json',
    'ping' => '/ping',
],

Create a Page to render the check(s)

Create the following file resources/views/health.blade.php:

1
2
3
4
5
6
7
8
9
10
11
12
13
14
15
16
17
18
<!DOCTYPE html>
<html lang="{{ str_replace('_', '-', app()->getLocale()) }}">
    <head>
        <title>Health Checker</title>
    </head>
    <body>
        @foreach ($healths as $name => $health)
            <div>
                <strong>{{ $health->label }}</strong>

                <p style="color: {{ $health->status === 'OK' ? 'green': 'red' }};">
                    {{ $health->status }}
                </p>
            </div>
            <hr>
        @endforeach
    </body>
</html>

Pass the Health Check Data to the view

Add the following to routes/web.php or a controller that you’ve created.

1
use UKFast\HealthCheck\Controllers\HealthCheckController;
1
2
3
4
5
6
7
8
9
10
11
12
13
14
15
16
17
Route::get('/', function () {
    $response = (new HealthCheckController)->__invoke(app());

    $healths = json_decode($response->content(), true);

    $healths = collect($healths)
        ->map(fn ($value, $key) => (object) ([
            'label' => $key,
            'status' => is_string($value)
                ? $value
                : $value['status'],
        ]));

    return view('health', [
        'healths' => $healths,
    ]);
});

Demo the application

Just start up the Laravel server with:

1
php artisan serve

The go to http://localhost:8000 to preview.